
What Are Common Failure Points in Combine Threshing Cylinders?
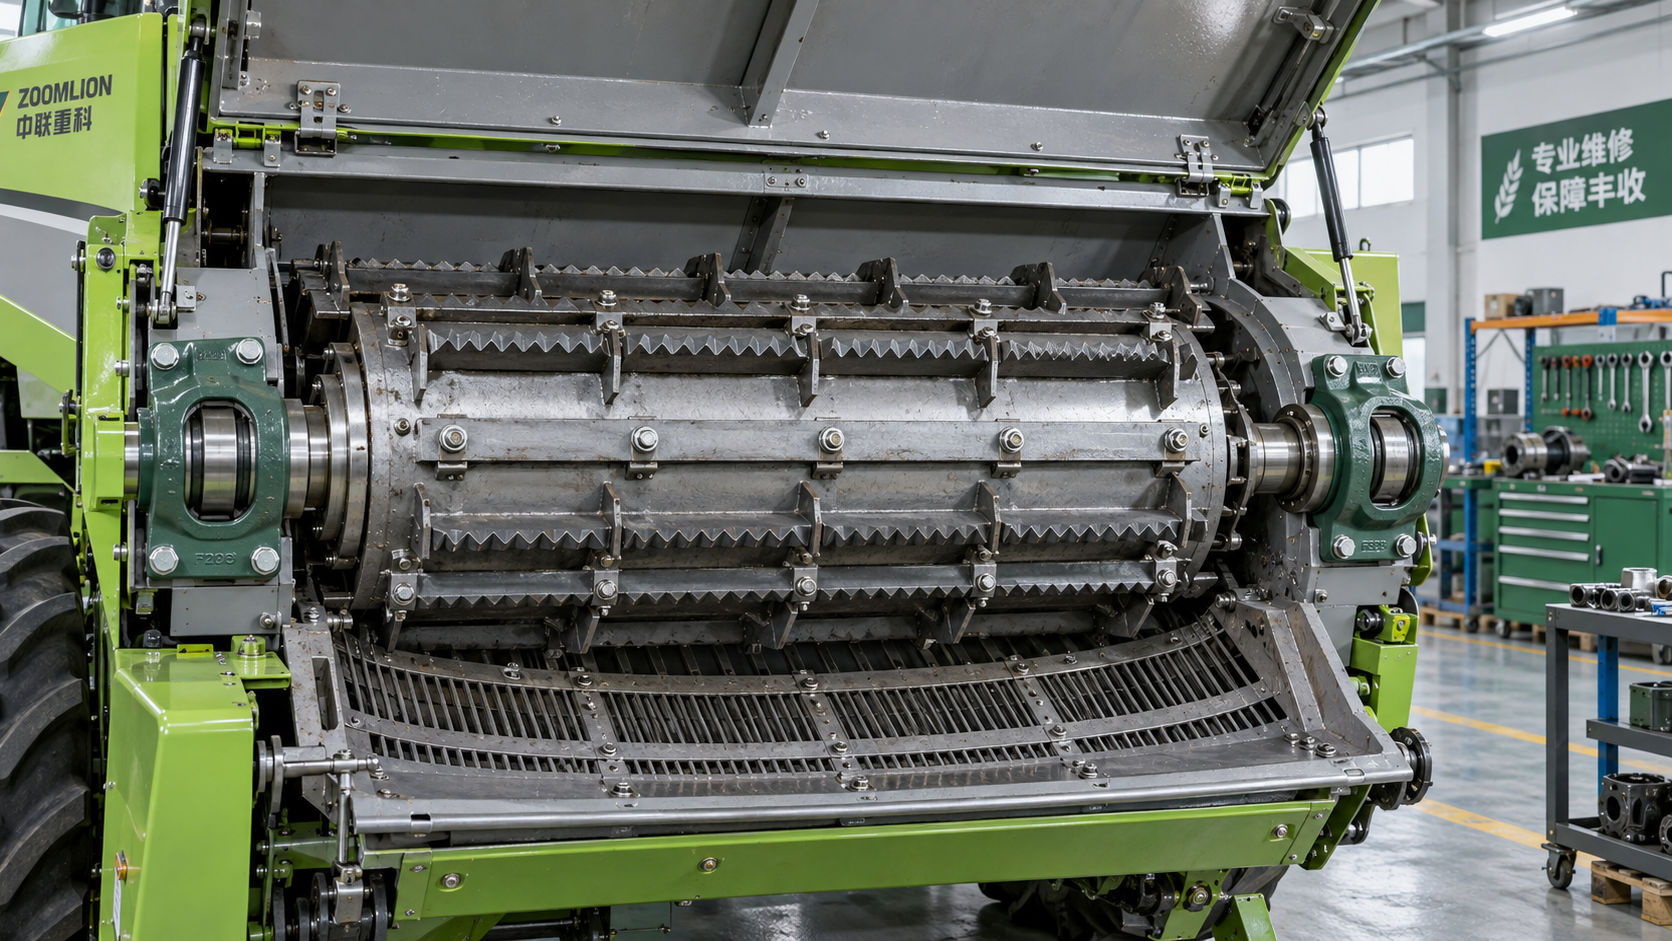
The most common failure points in combine threshing cylinders are worn rasp bars or teeth, deteriorating bearings, loose mounting hardware, damaged shafts and supports, and faults in the cylinder drive. Uneven wear, crop buildup, or impact damage can also upset cylinder balance. Concave damage and incorrect clearance deserve attention because they can produce similar symptoms or cause direct contact with the cylinder.
For operators and maintenance teams, the first decision is whether poor threshing comes from crop conditions and settings or from a mechanical defect. Unthreshed heads alone do not prove that the cylinder needs rebuilding. New vibration, metallic knocking, bearing overheating, or evidence of cylinder-to-concave contact demands a different response: stop harvesting and investigate before a repairable fault damages the wider assembly.
Which parts of the threshing cylinder are most vulnerable?
On a conventional combine, the cylinder’s crop-contact surfaces take repeated abrasive and impact loads, while its bearings, shaft, and drive transmit the forces needed to process changing crop volumes. Wear can therefore appear in several places at once. A slipping drive may accompany worn rasp bars, for example, because the operator has increased the threshing load to compensate for declining performance.
The terminology and layout vary by machine. Conventional transverse cylinders, spike-tooth cylinders, and axial-flow rotors use different components and service procedures. The failure mechanisms discussed here apply broadly, but replacement limits, balance requirements, tightening procedures, and clearances must come from the relevant machine’s service information.
Rasp bars, teeth, and their mounting points
Rasp bars lose their working profile as crop material and abrasive contamination pass through the threshing area. Rounded edges, reduced bar height, and uneven wear can reduce threshing effectiveness. Spike teeth can wear, bend, crack, or loosen, changing how they engage the crop.
Typical warning signs include persistent unthreshed material, uneven threshing across the machine, and a growing need for more aggressive settings to achieve an acceptable result. Those symptoms require inspection rather than an automatic increase in cylinder speed. Excessive speed or tight clearance may increase grain damage and power demand while leaving the underlying wear unresolved.
Check the complete circumference and width of the cylinder. One visibly damaged bar may indicate foreign-object entry; a broader wear pattern may indicate accumulated abrasion. Inspect mounting seats and bolt holes as well as the replaceable working surfaces. A new bar cannot remain secure on a cracked support or damaged mounting seat.
Bearings, seals, and bearing housings
Cylinder bearings can deteriorate through contamination, lubrication problems, misalignment, overload, or fatigue. Damaged seals allow dust and moisture to enter, while a loose housing can let a serviceable bearing move under load.
Warning signs include rumbling, increasing vibration, lubricant leakage, abnormal heat, or detectable play during a safe stationary inspection. Temperature alone does not establish the cause: load and operating conditions affect bearing temperature. A rising trend under comparable conditions, especially when accompanied by noise or vibration, is more useful than a single reading.
When replacing a failed bearing, examine the shaft journal and housing fit. Fretting, scoring, or an enlarged housing bore can cause the replacement to fail again. Lubrication also needs to follow the machine’s requirements; some bearings have specific greasing procedures, while others are sealed and are not intended for routine relubrication.
Fasteners, cylinder supports, and structural connections
Loose hardware can allow a rasp bar, tooth, or support to move repeatedly before it visibly separates. That movement damages mating surfaces, elongates holes, and changes the cylinder’s mass distribution. Missing hardware or a displaced component can then create severe imbalance or internal impact.
Look for fretting marks, disturbed paint, polished contact areas, cracked brackets, and movement around mounting points. Simply tightening a loose bolt may be inadequate if the joint has already lost its correct fit. Use the specified fastener grade, locking arrangement, and torque procedure, and replace damaged mounting parts where required.
Recurring looseness deserves investigation into vibration, installation, and joint condition. Treating it as an isolated fastening problem can leave the initiating fault in place.
What causes cylinder vibration, and how serious is it?
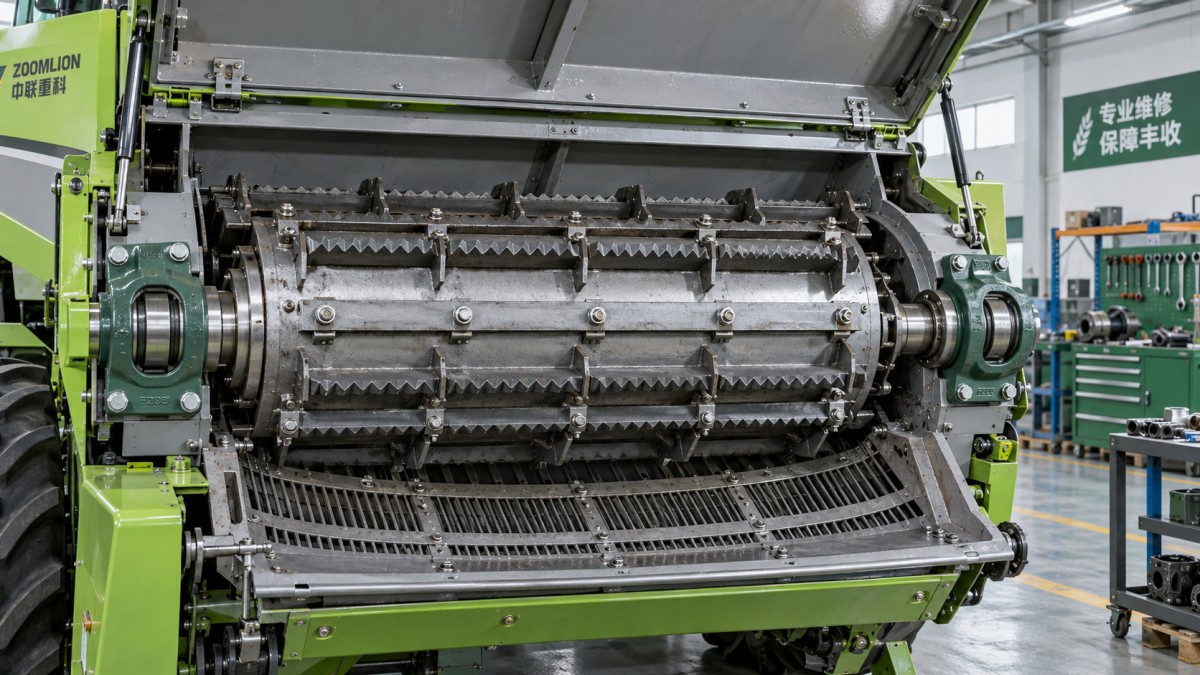
Vibration can originate from uneven rasp-bar wear, missing components, wrapped crop material, retained debris, a bent shaft, bearing damage, or distorted cylinder supports. Impact from a stone or metal object can create several of these faults simultaneously.
A useful diagnostic distinction is whether vibration appears only while feeding crop or also occurs when the threshing assembly runs empty. Crop-dependent vibration directs attention toward uneven feeding, plugging, crop moisture, and load response. Vibration that persists without crop raises concern about imbalance, rotating damage, bearings, or the drive. This distinction narrows the investigation but does not identify the failed component by itself.
New, strong, or rapidly worsening vibration is a stop-and-inspect condition. Continuing to run can increase bearing loads, loosen hardware, and extend cracks. Clearing packed material may restore balance, but it should be followed by inspection for the reason material accumulated and for any resulting damage.
Replacing one worn or broken rasp bar also requires care. Replacement strategy depends on the cylinder design and the manufacturer’s balancing instructions. Where matched weights, opposing positions, or complete sets are specified, follow those requirements. A cylinder assembled from incompatible or unevenly worn parts may rotate freely by hand yet vibrate at operating speed.
Can shaft damage or misalignment be mistaken for a bearing problem?
Yes. A bent shaft, worn bearing seat, displaced housing, or distorted support can produce noise and heat that initially appear to indicate a defective bearing. Repeated bearing failure at the same location is a reason to examine alignment and fits before installing another replacement.
Shaft damage may follow a severe plug, foreign-object impact, or continued operation with a loose bearing. Inspection should consider journal condition, runout, bearing location, and the relationship between the cylinder and concave. These checks may require service measurements beyond what an operator can establish through an access panel.
Cracked discs, spiders, or other cylinder support members also deserve close attention. A crack near a bar mount or shaft connection affects the assembly’s ability to carry load. Welding or straightening such parts without an approved repair procedure can alter alignment, strength, and balance. The repair decision should account for the complete rotating assembly.
Which drive faults reduce threshing performance?
The cylinder can be mechanically intact while its drive fails to maintain the commanded speed. Depending on the combine, vulnerable parts may include belts, variable-speed sheaves, chains, sprockets, couplings, keys, splines, or gear components.
Belt glazing, damaged belts, worn sheave surfaces, incorrect tension, contamination, or a sticking speed-adjustment mechanism can contribute to slip and unstable speed. Chain drives can develop worn joints, damaged sprocket teeth, or alignment problems. Loose hubs and worn keys or splines can create backlash and intermittent power transmission.
A drive problem may show up as speed dropping under load, inconsistent threshing, belt odor, unusual drive noise, or excessive heat. However, overload from wet crop or a developing plug can produce similar symptoms. Compare the commanded setting with actual cylinder speed where reliable monitoring is available, and inspect both the drive and crop path.
Increasing belt tension without checking specifications can transfer excessive load to bearings. Replacing a belt while leaving worn sheaves or a faulty tensioning mechanism in service may provide only temporary improvement.
How do concave faults and incorrect clearance affect the cylinder?
The concave is a separate component, but its condition directly affects cylinder performance. Bent sections, damaged bars, lodged debris, or an adjustment mechanism that no longer holds position can create uneven working clearance. One side may thresh aggressively while the other allows incompletely threshed material through.
Clearance settings should be checked against the actual mechanical gap. A cab display or adjustment scale cannot confirm that the concave remains correctly aligned after impact, wear, or linkage damage. Measure at the locations and cylinder positions specified for the machine, following its service procedure.
Metallic contact marks, scraping, or knocking can indicate cylinder-to-concave interference. Stop operation and inspect the cause. Opening the concave may remove immediate contact, but it does not correct a bent cylinder component, loose support, or displaced concave.
Plugged concave openings can also impair crop flow and separation. The resulting loss or load increase may be blamed on the cylinder even when its working surfaces remain serviceable.
How can operators distinguish wear from a settings problem?
Start with the harvested material and the operating conditions. Crop moisture, maturity, straw toughness, feed consistency, ground speed, and concave selection all affect threshing demand. A setting that worked in one field may perform poorly after crop conditions change.
Use the manufacturer’s crop guidance as a starting point, then make controlled adjustments and assess the result. Change one relevant setting at a time where practical. Check unthreshed material, grain damage, and losses together; improving one measure while sharply worsening another is not a successful adjustment.
- Unthreshed heads with stable machine operation: check crop conditions, feeding, speed, clearance, and wear on the threshing surfaces.
- Cracked grain: assess threshing aggressiveness and inspect other grain-handling components that could cause damage.
- Speed loss under load: investigate excessive feed, plugging, drive slip, and the speed-control mechanism.
- New vibration or metallic noise: prioritize mechanical inspection before further field adjustment.
Grain loss behind the combine also requires careful interpretation. Header loss, incomplete threshing, separation loss, and cleaning-shoe loss have different causes. Repeatedly increasing cylinder speed to address loss originating elsewhere can add wear and grain damage without recovering the lost crop.
What should be checked before restarting after a plug or impact?
Before entering or reaching into the threshing area, shut down, isolate the machine according to its service instructions, remove the key, and wait for all moving parts to stop. Secure raised components and address stored energy as required. A stopped cylinder can still move when trapped crop or drive tension is released.
After safely clearing an obstruction, inspect the full accessible cylinder assembly for bent or missing bars, damaged teeth, loose fasteners, cracked supports, and contact marks. Check the concave and drive as well. Turning the assembly manually is appropriate only where the manufacturer provides a safe procedure; free movement alone does not establish that it is fit to run.
If no defect is found, restart using the prescribed procedure with guards installed and people clear. Monitor noise, vibration, and speed before returning to crop. Persistent abnormal behavior calls for further diagnosis, even if the machine can still thresh.
When is a component replacement enough, and when is a wider repair needed?
An isolated worn component may be replaceable when its mounting surfaces, supports, shaft, bearings, and mating parts remain within service limits. A wider repair becomes more likely when inspection finds repeated bearing failures, distorted supports, damaged mounting holes, shaft runout, structural cracks, or wear distributed across the assembly.
For maintenance planning, record what failed and what accompanied it: vibration, load, crop condition, temperature changes, drive behavior, and evidence of impact. Those observations help distinguish normal wear from an unresolved mechanical cause. Before returning the combine to full harvesting load, establish that the repair restored secure mounting, correct clearance, stable rotation, and dependable drive performance.
Related Intelligence